Here I would like to share experiences about the simple steps to build a blog using Blogspot (Blogger). In addition there is also Blogspot WordPress which will be discussed in another post.
Before beginning we should know in advance to understand what it is blogs, blogs are personal diaries . Mimbar you every day. Political soapbox. News outlets.Collection of links. Your own private thoughts. Note to the world.
Your blog is whatever you want. There are millions of blogs, in all shapes and sizes, and there are no real rules.
In simple terms, a blog is a web site, where you write stuff on an ongoing basis. New stuff shows up at the top , so your visitors can read what's new. Then they comment on it or link it or email you. Or not.
Since Blogger was launched in 1999, blogs have reshaped the web, political influence, sharpen journalism, and enabled millions of people to have a voice and connect with others. ( http://www.blogger.com/tour_start.g )
Well now ready to build a blog, our first step is to prepare first theme and what materials will we put in the blog. Once we get the theme and then we proceed to determine the major categories of themes that we have set it.
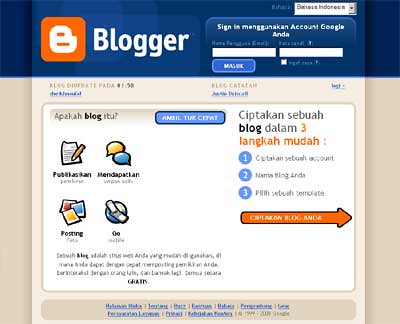
Once the theme is ready, now we start, point to address www.blogspot.com . Here we will be directed to Blogger , do not be surprised that Blogspot has been acquired by Google (blogGoogle called Blogger). For simplicity, we suggested already have an email account in Gmail (Google Mail), if not please create a Gmail account atwww.gmail.com .
To facilitate the understanding, change the language into the Indonesian language.The next step click 'Create Your Blog'.
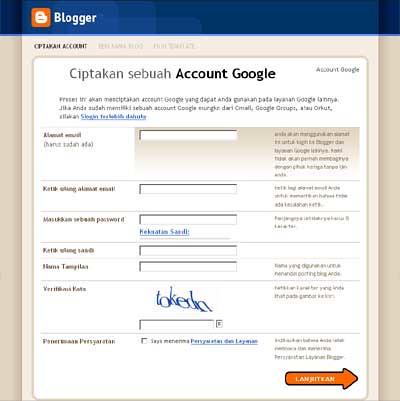
Fill in the email form with your Gmail email address, and password (recommended minimum of 6 characters with a combination of numbers and letters) . The display name is the name that will appear on your blog header. Fill in the verification word the same as the existing image on it (in the example written 'tokedn'. Tick the option to receive the approval requirement (to find out the requirements please click the link and service requirements), then click 'Continue'.
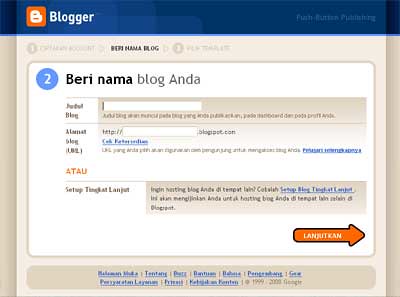
The title of the blog is filled according to your blog header name, address filled with the address where blogAnda will be accessible (preferably the same as the title of the blog header). Next klik'Lanjutkan 'to enter the next stage.
The final step is to determine the theme of the blog. Please select display blogberdasarkan existing template, this template can be changed again later. To see examples of our blog can click on the picture , here we will be brought to see the blog in actual size. Once we specify the display, then click 'Continue'.
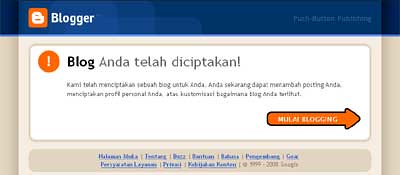
At this point the process is complete membuatan blog. The next step we can start posting (making an article fit for us in our blogs).
This is the view of our work area when processing an article which we will upload.Here there are 3 main tabs (Posting, Settings, and Layout), where each tab has its own sub-tabs for different functions.
Caption: (1) Blog Title (2) the Main Tab, (3) Blog address, (4) Main subtab, (5) Form title of the article, (6) 'Compose' shows the format of writing the article in plain view (without html code), otherwise the 'Edit Html' is the format of writing the article using the code (script) html; (7) Tools editing text (like in ms word), from the font type, size, flatness text , add images, hyperlinks, insert a quote, and so on; (8) 'Preview' will take us to an example page containing artikelyang we are if (previewdisplay), (9) input fields and contents of the article written on the bottom of the 'Labels' are words that will appear below after the article is empty (fill in with words that represent the content of our writings if), (10) 'Publish post' means that we will display the article and can be read by visitors, while the 'Save Now' means we save the article and can not be seen by visitors.
In the tab 'Layout' we can personalize the look of blogs, here we can add special items to every part of the blog (headers body, sidebar, and footer). Additional items themselves have been provided, we just choose and put in place what we want. For additional items not provided by blogspot, we can find it by using the Google Search with the keyword 'plugin blogspot', the search results usually later in the form of a script (java codes or html), this script we live copy and paste in the item Blogspot (Html / JavaScript).
If we want to change the language we use and the blogs, we can change through the 'Control Panel' (click Control Panel menu in the top right corner). Here we can also membuatblog new with the same Gmail email account by clicking Create a blog.
Done.
Source: www.blogspot.com (www.blogger.com)


0 komentar:
Post a Comment